In this guide, we are going to walk you through the no-code setup to sell your digital downloadable products like PDFs, videos, audios, etc.
The tools we are going to use are completely free to start with, except for Stripe payment processing commission. But no upfront payment required, Stripe charges only for the actual transactions.
Here is the list of services we are going to use:
- Google Drive: for storing digital products.
- Stripe: to create payment pages for any of your products.
- Templid: to send email with the product link to the customer after the successful payment.
Let’s get started.
Store and share your digital products
Our digital products are basically files, that need to be stored somewhere and shared with others.
Google Drive is a free and well-known solution for storing and sharing any type of files.
Go to your Google Drive and click on the “+ New” button on the top left.

Click on the “File upload” and select the file from your computer.

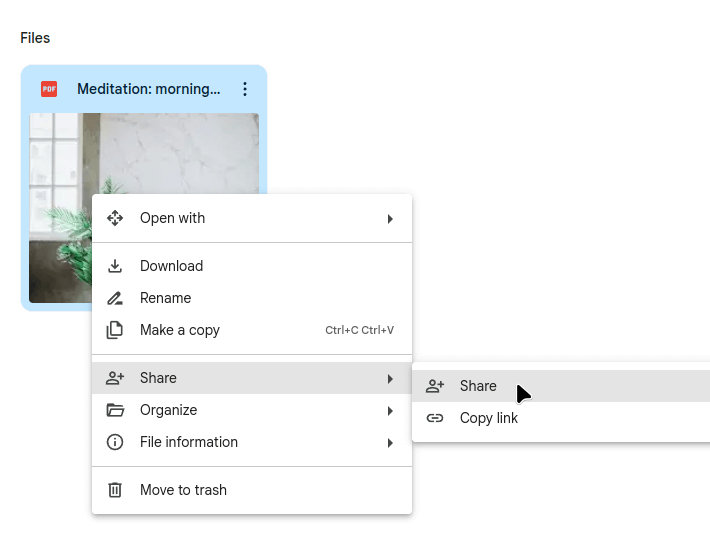
When the upload is finished, right-click on the file, hover over “Share” and click on the “Share” option.
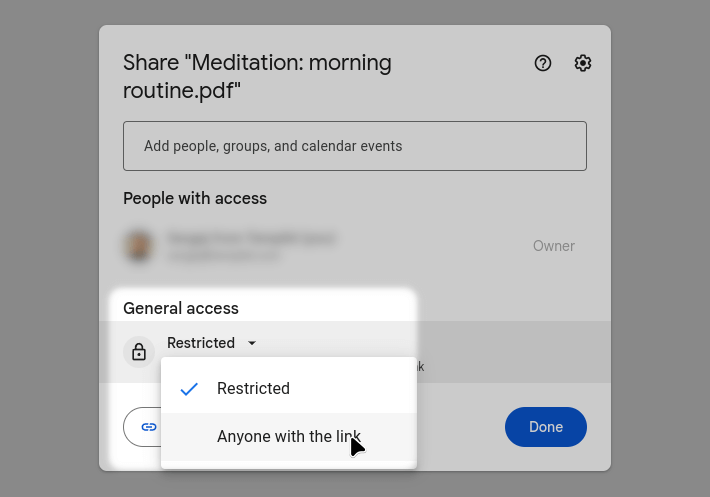
Under the “General access”, click on “Restricted” and change it to “Anyone with the link”.
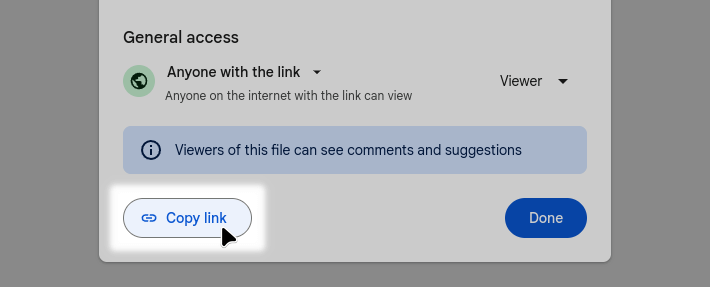
Click on the “Copy link” button. This will be your product link, and you will be able to share it with your customers after they purchase your product.
Later in this guide, we are going to use this link in our email template.
Create your Stripe payment page
Login to your Stripe account.
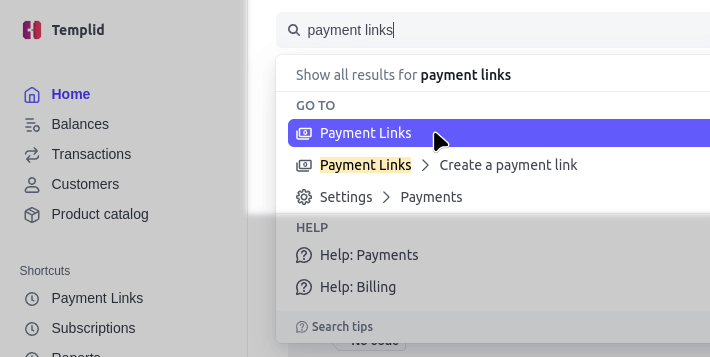
In the top search bar, type “payment links” and click on “Payment links”.
On the top right, click on the “+ New” to create a new product.

On the left side, under the Product title in the search bar, click on “+ Add new product”.
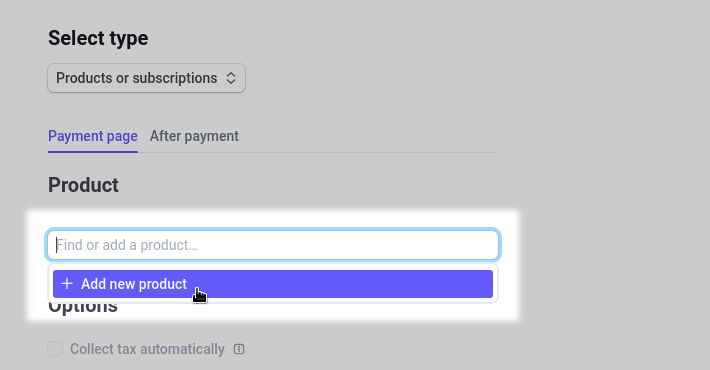
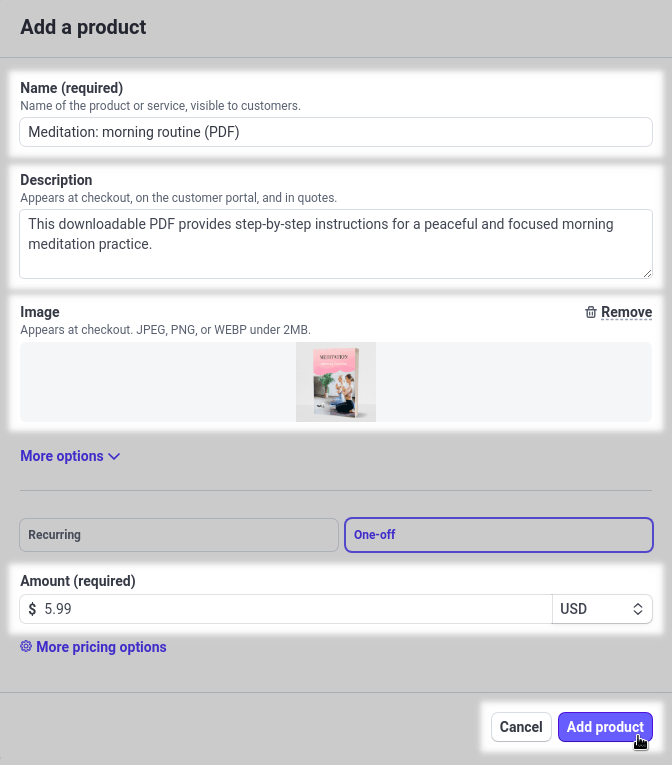
Now you’ll need to enter the details about your product. This is not your actual product that people can download. The information will only be used to display product information to your customers at the checkout.
For the below product, we’ll use a PDF book as an example. Here are the fields we need to fill:
- Name
- Description
- Upload an image of our PDF cover
- Specify the amount and the currency
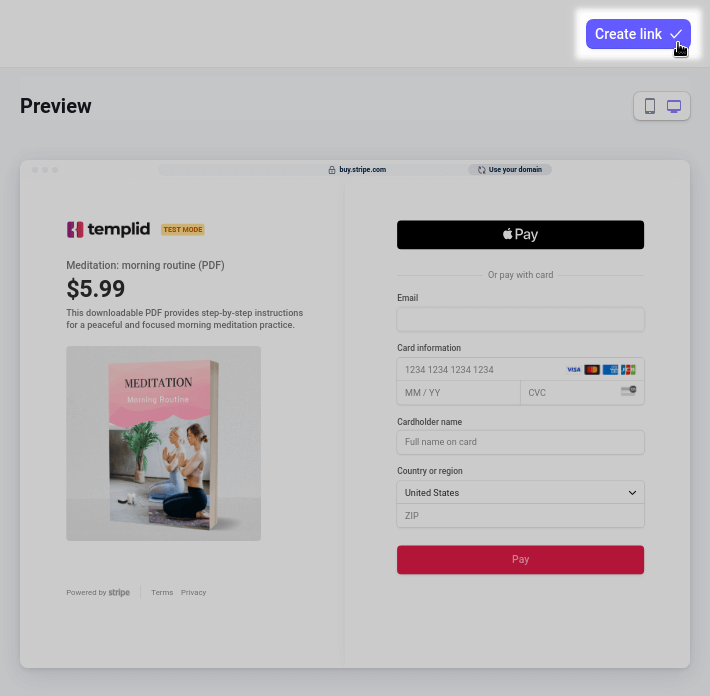
Now you can click on the “Create link” on the top right, above the preview.
Let’s add metadata in order to trigger the correct email sending after product purchase. You can have multiple products, and each will have its own email with the file download link. Metadata allows you to join specific product sales with the related email template.
On the Payment link page, scroll down to the Metadata section and click on the “Edit metadata” button.

You’ll need to specify the Key and the Value. It is recommended to use only letters, numbers and underscores for the Key. We can come up with any Key we want. Important: the Key must be the same across all your Payment links.
The Value must be unique for each payment link. This way, the algorithm will look up for the same Key after each purchase and, based on its Value will send an appropriate email to the customer.
In our example, we’ll use the following Key-Value pair:
- Key: product_id
- Value: meditation_pdf_1
After you have specified your Key-Value pair, click on Save.

Now you can copy the payment link and use it in anywhere you want: send a direct message, email, social media, blog, website, etc.
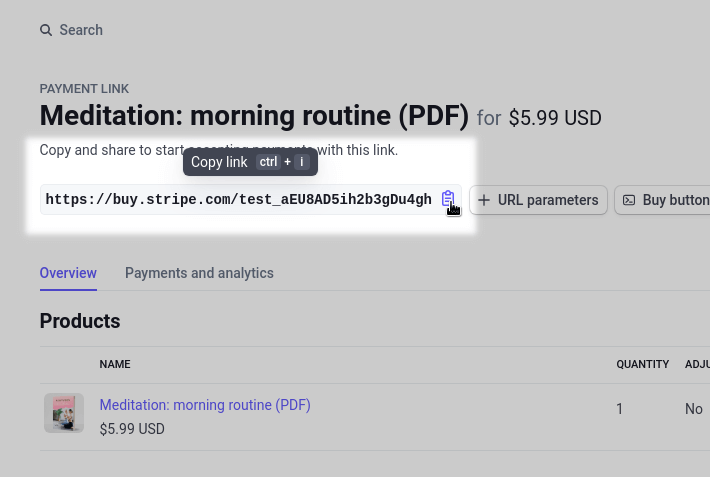
After the above steps, you will be able to collect payments. If you are comfortable sending emails manually after each payment, you can stop reading and start selling your digital products without the website.
But if you want emails to be sent automatically after each payment, please follow the below instructions.
How to send an automatic email after the payment
We’ll use Templid service to store email templates and send them automatically after every purchase.
In this part, we will go through the following steps:
- Create an email template.
- Integrate with Gmail to send emails on your behalf.
- Set up a Webhook Link to receive payment triggers from Stripe.
Create an email template for your product
First, create your free Templid account here: https://templid.com/register.
Fill out the form with your data and click on “Register”.
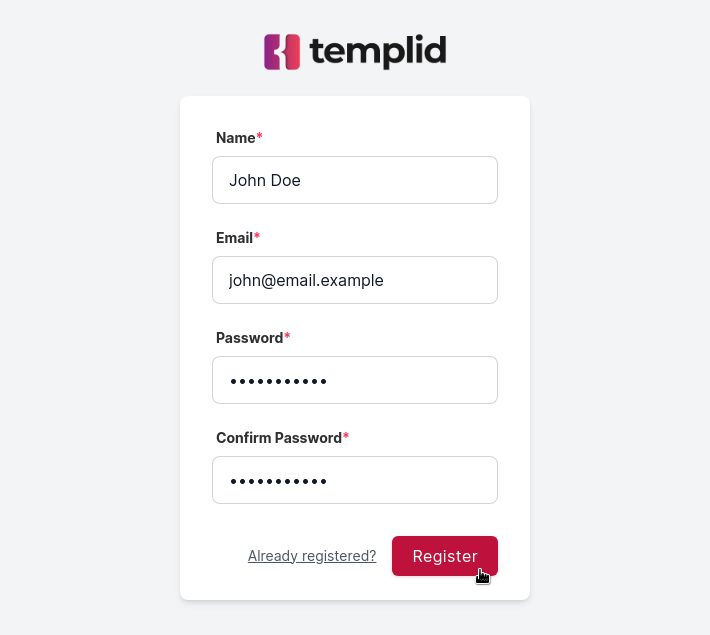
Right after the registration, you will get a confirmation email with the link. Click on the link in your email, and you’ll get straight to the dashboard.
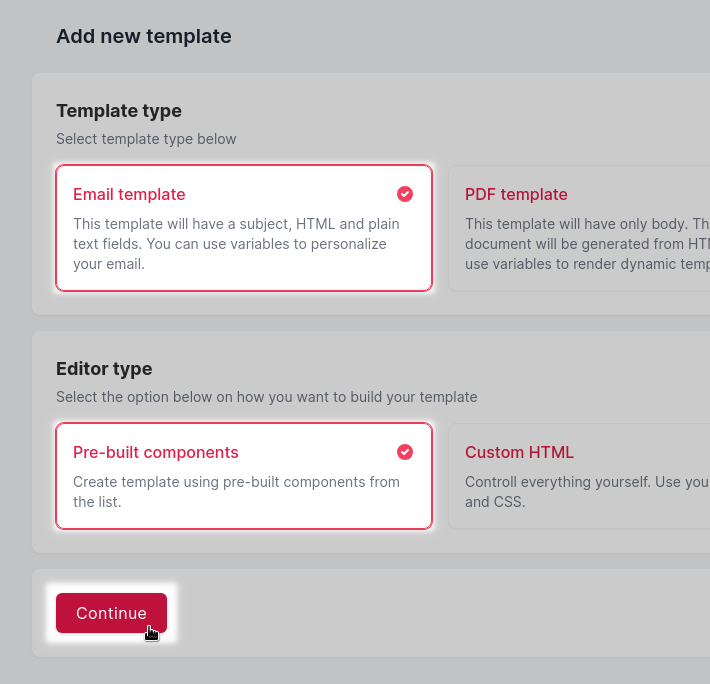
In the “Templates” section, click on “Add new template”.

Select “Email template” and “Pre-built components” options and click “Continue”.
Create the email template that your customer will get after a successful purchase.
Enter the “Template name”, “Email subject” and the “Email body”. Use your product link in the email body, so people will be able to view and download the file they bought.
You can read more about our free email builder.
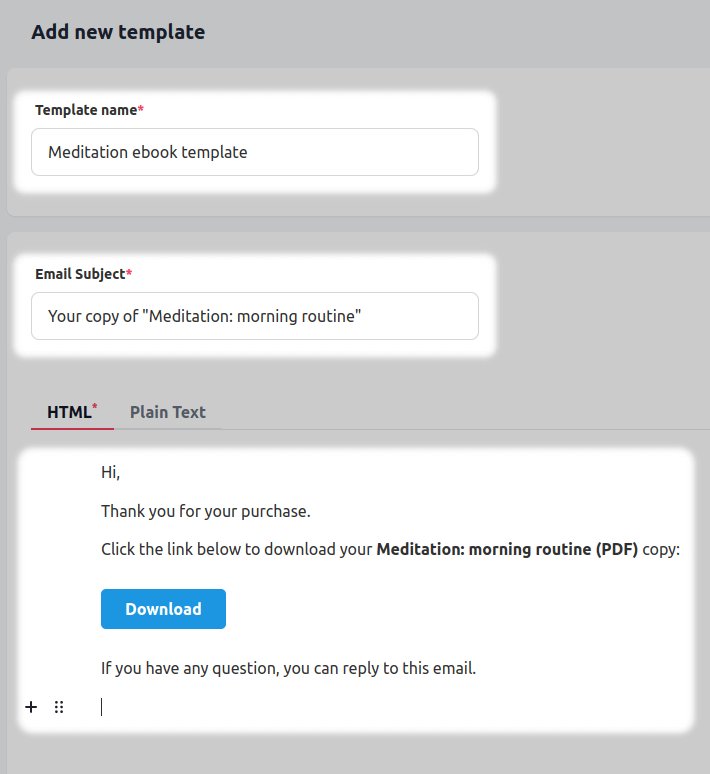
After your email copy is ready, click on “Save new template”.
You will be able to modify the email any time later.

Connect your Gmail SMTP to send emails on your behalf
In order to send emails, we have to create and integration and add SMTP credentials. The easiest and free SMTP solution is Gmail.
If you are familiar with SMTP, you can use any server you want, but in this tutorial, we’ll guide you on how to integrate with Gmail SMTP.
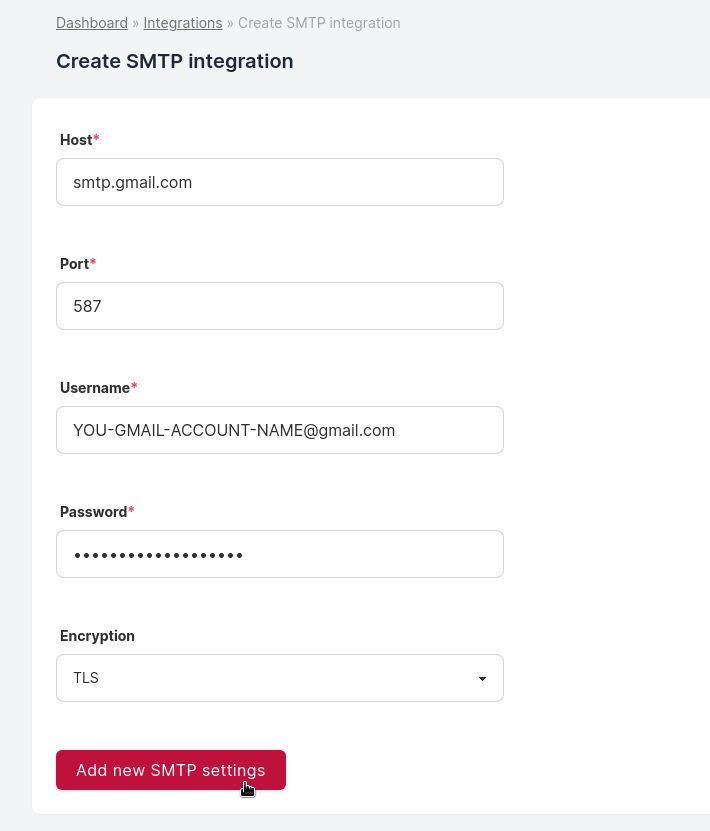
In your dashboard, go click on “Integrations” on the left-side menu. After the new page is loaded, click on “Create SMTP integration” button.
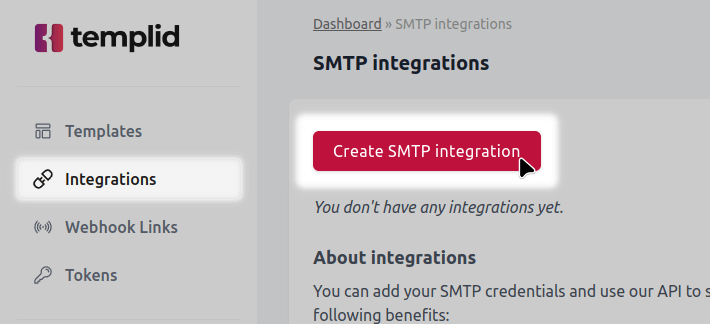
Fill the form with the following data:
- Host: smtp.gmail.com
- Post: 587
- Username: full email from your Gmail account
- Password: Google account’s App password (find the instructions below)
- Encryption: TLS
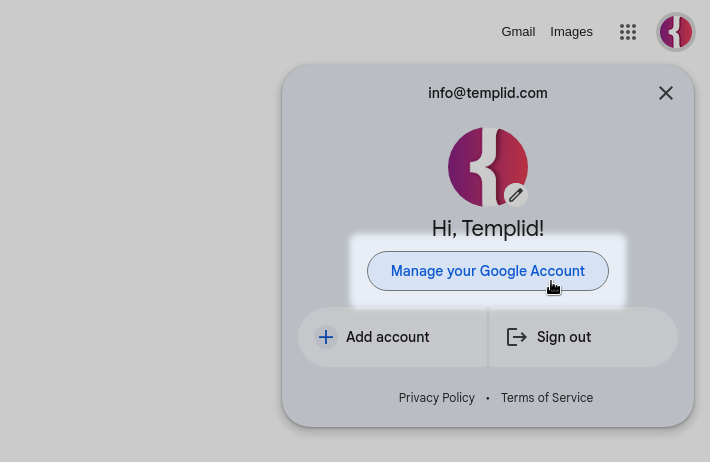
To get your App password, go to your Gmail account, click on your icon, and navigate to “Manage your Google Account”.
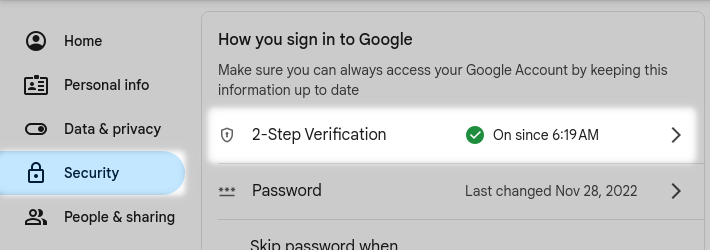
Make sure, you have active 2-Step Verification in your account. Only accounts with the 2-Step Verification enabled are allowed to use App password to integrate with third-party services.
To check the status or enable it, go to “Security” and scroll down to the “How you sing in to Google” section and click on “2-Step Verification” to enable it.
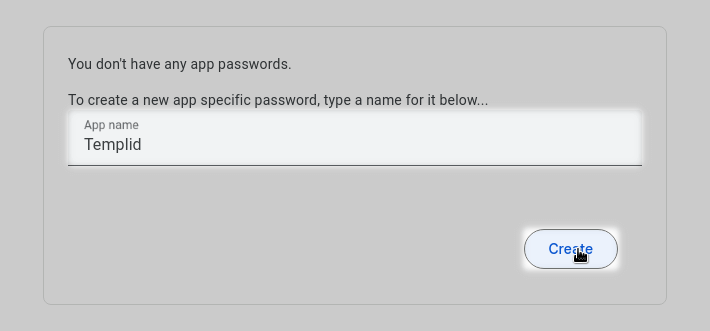
If your 2-FA is enabled, search for “App password” in the top search bar, and click on the link in the results.

In the form, type the name of the app and click on “Create”.
You’ll see your new password in the pop-up window. Copy this password, go to the Templid integration setup, and paste it into the password input.
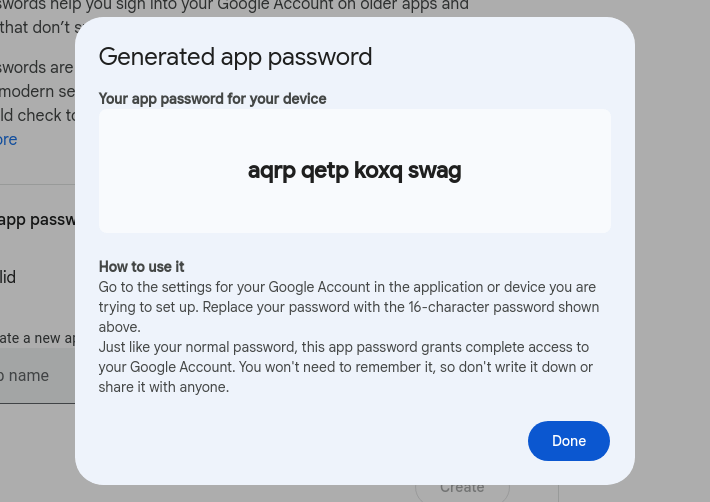
Save your new integration.
Create a Webhook link
Webhook links allow receiving events from the Stripe after every purchase.
To create a Webhook link, click on the “Webhook links” in the left menu. On the new page, click on the “+ Create webhook link” button.
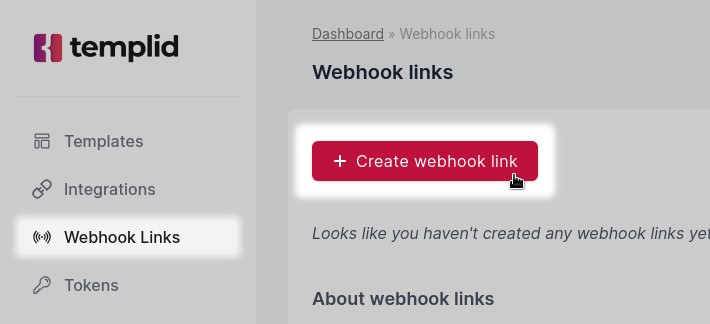
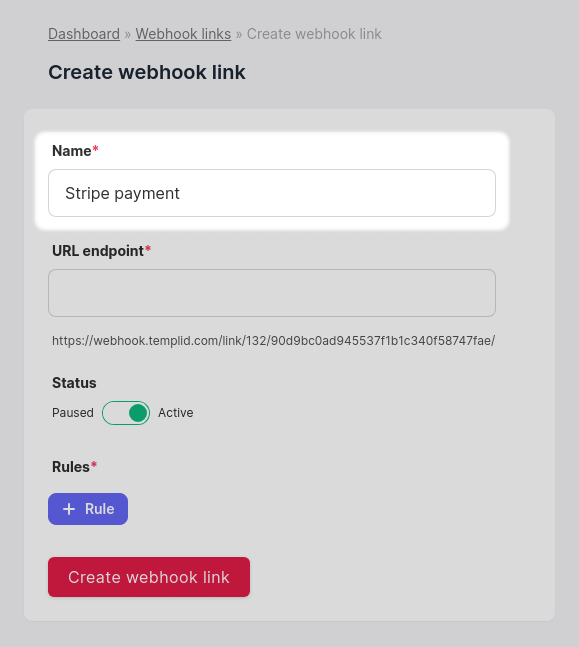
Create the name for your Webhook link, this will be visible only to you.
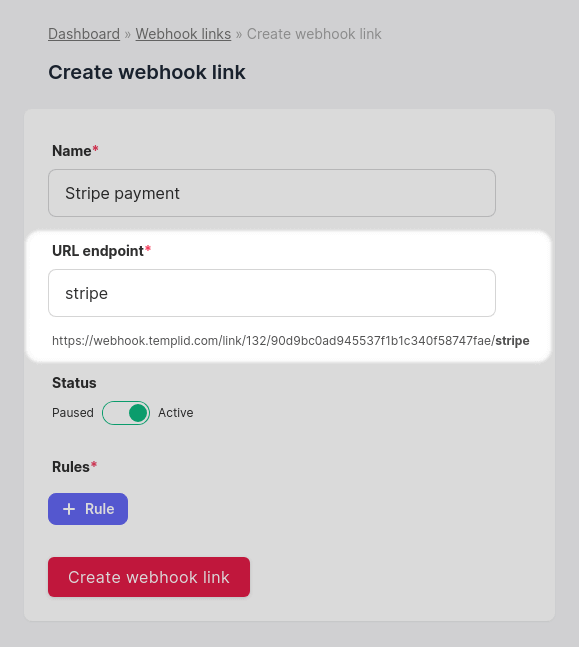
Enter the link’s endpoint. The link below the input will be your actual URL.
Now we need to add the rule to instruct the system when and where to send emails.
Click on the “+ Rule”.
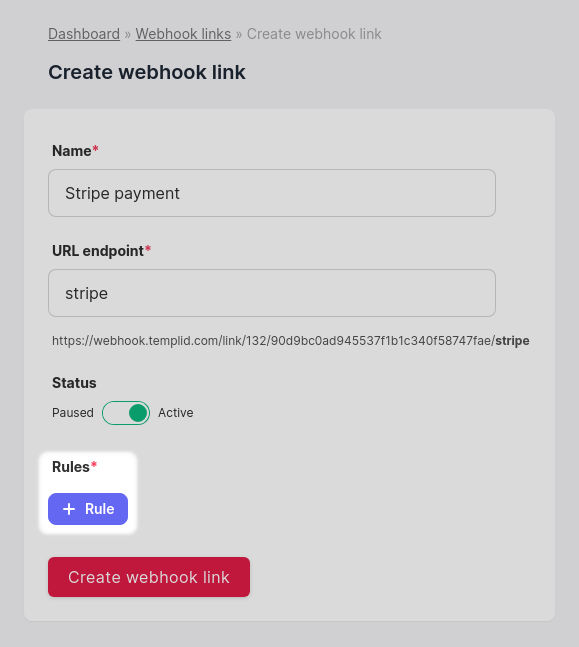
Enter the name for your first rule. Let’s use the same value meditation_pdf_1 as we defined in the Stripe payment link setup. Next, click on the “Edit” link.

In the modal window, click on the “+ Filter” button.
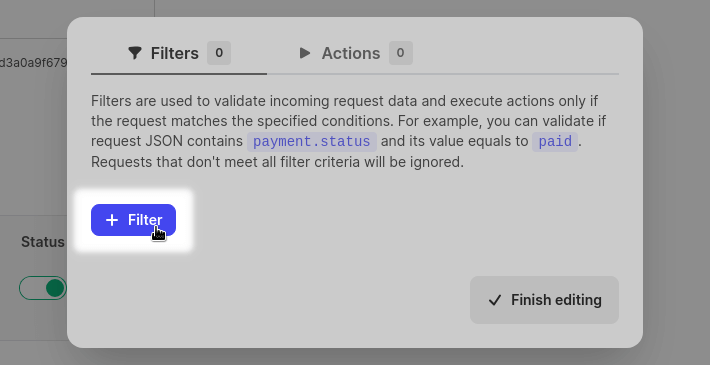
Stripe will send different types of events to our Webhook link, so we need to filter only those relevant to our product.
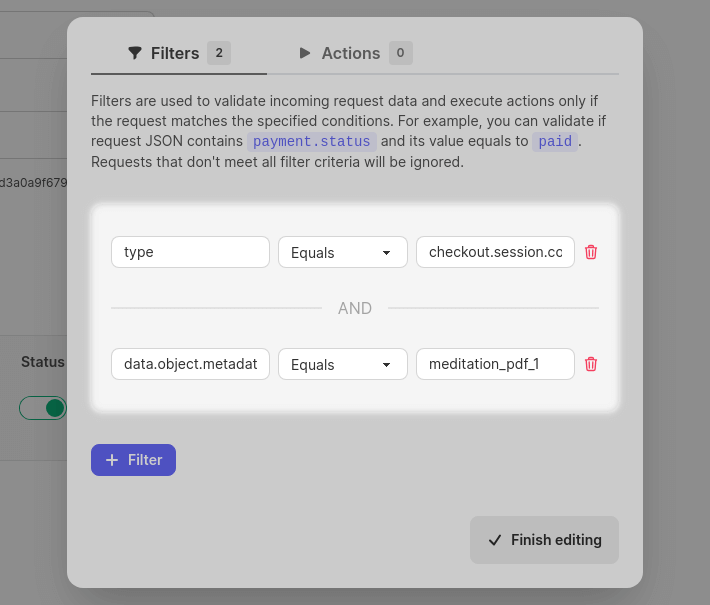
Add two filters.
The first filter will allow only events, that represent successful payment:
- Field key: type
- Operator: Equals
- Value: checkout.session.completed
The second filter will catch specific product sale data:
- Field key: data.object.metadata.product_id
- Operator: Equals
- Value: meditation_pdf_1
Select the “Actions” tab on the top and click on the “+ Action” button.
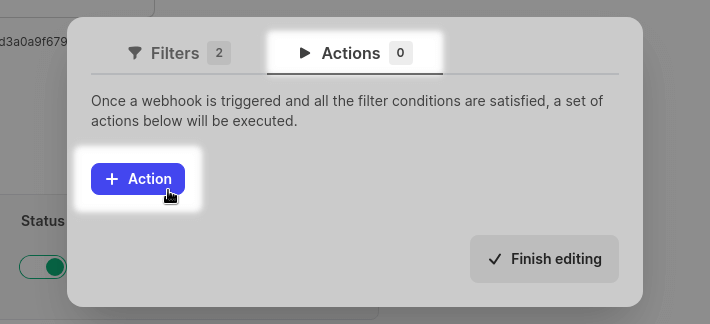
Fill out the form with the following data:
- Integration: select the integration you’ve created in the previous step
- Email template: select the template for your product
- Sender: enter your Gmail email address and your name
- Recipient email: use a placeholder {{ data.object.customer_details.email }}, it will be dynamically replaced with the actual customer email from Stripe.
- Recipient name: use a placeholder {{ data.object.customer_details.name }}, it will be dynamically replaced with the actual customer name from Stripe. You can leave the name field blank if you want.
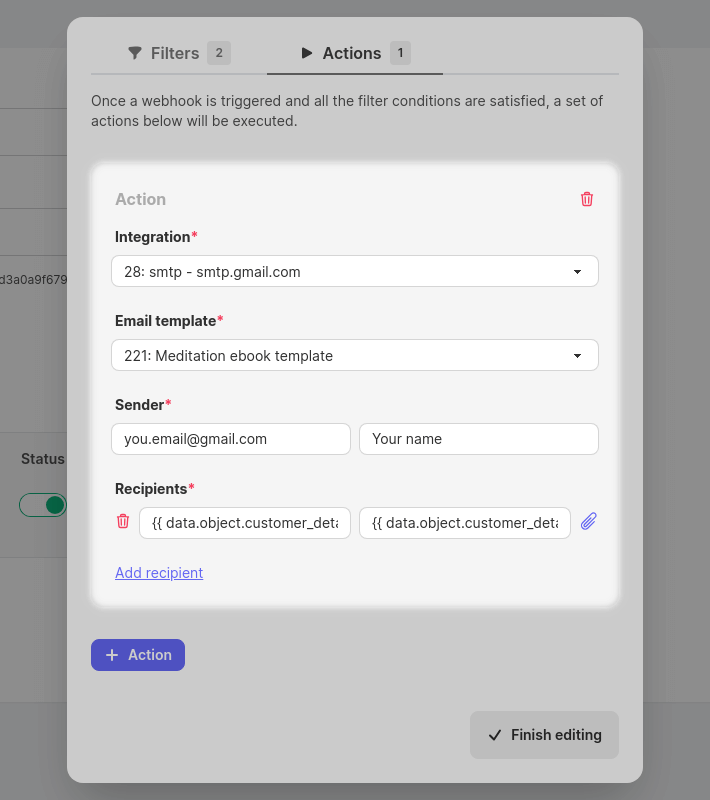
Click on “Finish editing”.

Now click on the “Save webhook link” button.

Copy the webhook link you just created.
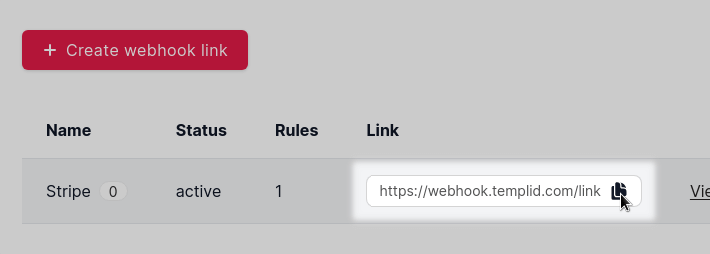
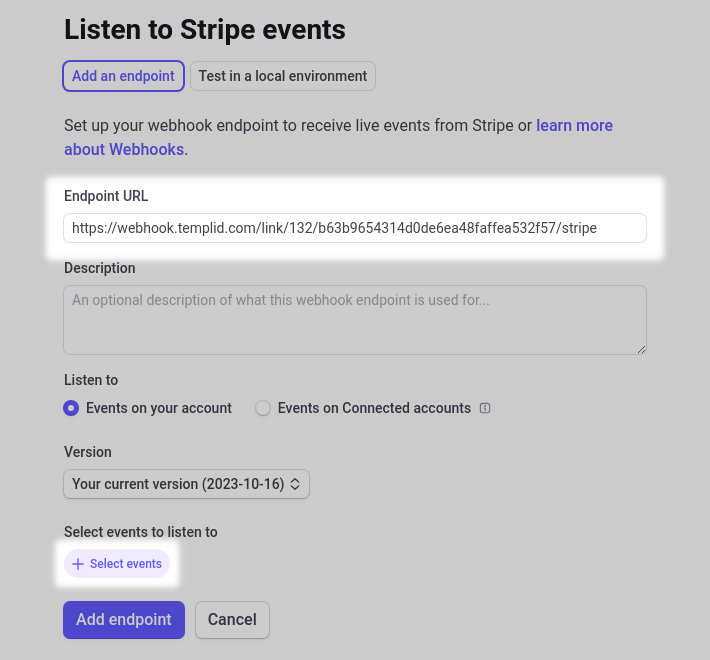
Now go back to your Stripe dashboard. Click on the “Developers” link in the top right and click on the “Webhooks” tab.

Click on the “+ Add endpoint” button.

Paste your Webhook link into the “Endpoint URL” input and click on “+ Select events”.
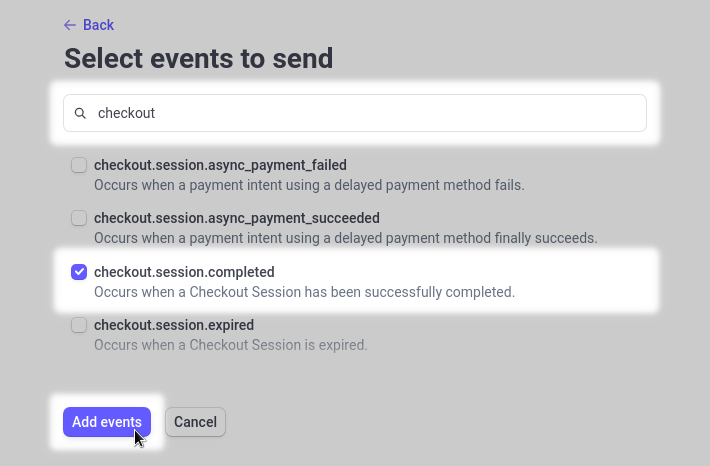
In the search bar, type “checkout” and select the checkout.session.completed event from the list. Click on “Add events”.
Finally, click on “Add endpoint” to save your changes.
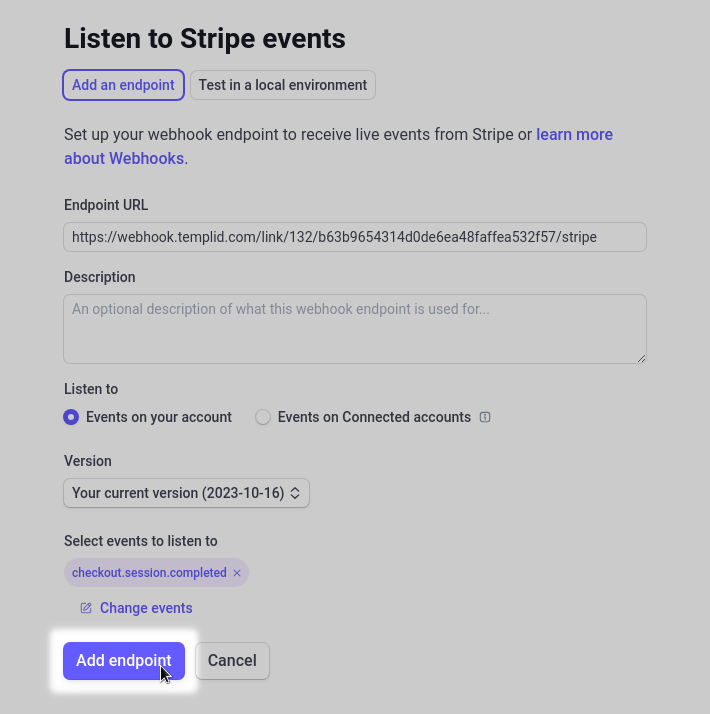
From now on, your process if fully automated. Every time customer will make a purchase the email will be sent automatically.
Conclusion
As you can see, the setup process requires some time, but it is completely free.
Also, you have a full control over every step in your sales process.
If you have any questions or suggestions, leave a comment below.


Write your comment